


Frequently asked questions
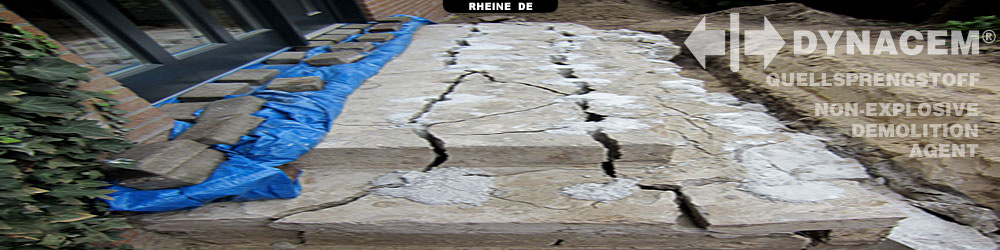
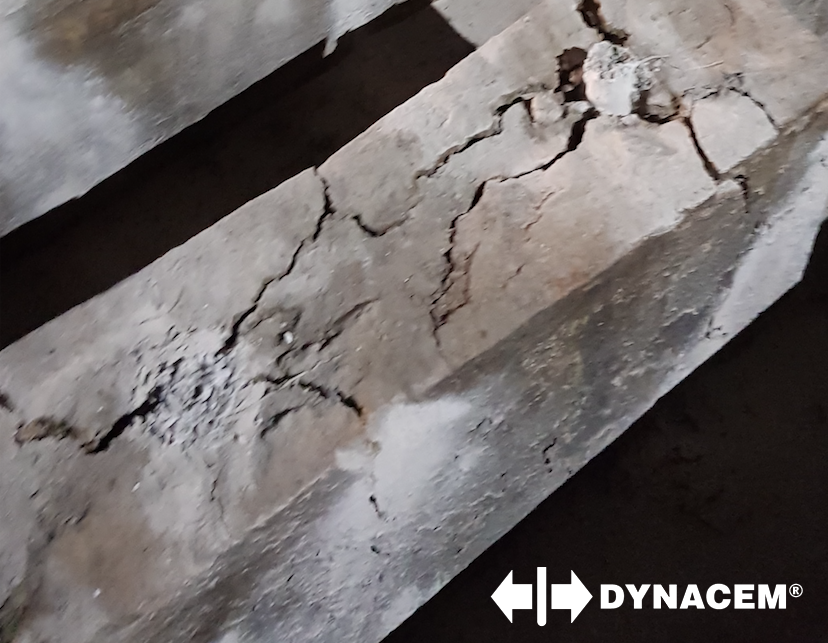
It is normal. Dynacem mix in contact to air turns into powder. Depending on temperature, air humidity, precipitation and time, topical layer of the mix remains hard or soft, or liquid, or muddy, or dusty, or it looks like cauliflower coming out of the hole. Use a piece of bent wire to confirm that there is hard mix present 1 or 2 cm below the soft topical layer.
Temperature - temperature of rock/concrete measured inside the hole,
X °C - approximate minimum application temperature, Dynacem version can be used below (works very slow) and above X (works faster),
Y °C - maximum temperature for safe application in hole diameters up to 42 mm,
Y+5 °C - maximum temperature for safe application in hole diameters up to 32 mm.
Each version is fast performing at the top of its application temperature range (breaks rock within 6-18 hours typically, at hole diameter of 40 mm) and may cause dangerous blow-outs above its maximum temperature for safe application Y.
Maximum temperature for safe application Y is only important (and can not be exceeded) in the moment of filling holes and during the first 4 hours after filling. For this reason, it is often possible to use Dynacem Standard in the summer if the cool holes are filled early in the morning.
Reaction slows down and breaking time increases almost 2 times with every 5 deg C drop in temperature, or with a hole diameter reduction to 30 mm.
You can store Dynacem in unopened bags 1 year from purchase day or longer.
After 1 year you feel no difference in field performance.
After 2 years it breaks the same rock but it needs 2 days (3 days for reinforced concrete) instead of 1 day.
After 3 years it needs 3 days (may not work with reinforced concrete).
Opened bag will decay faster, but you can vacuum pack it to keep fresh for another 1 year.
You can vacuum pack unopened bags to keep fresh for 3 years (and probably longer).
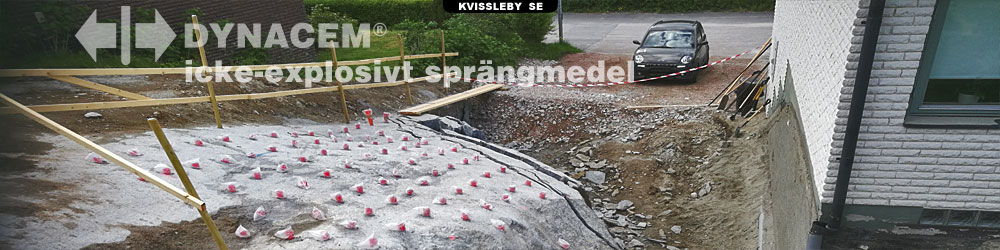
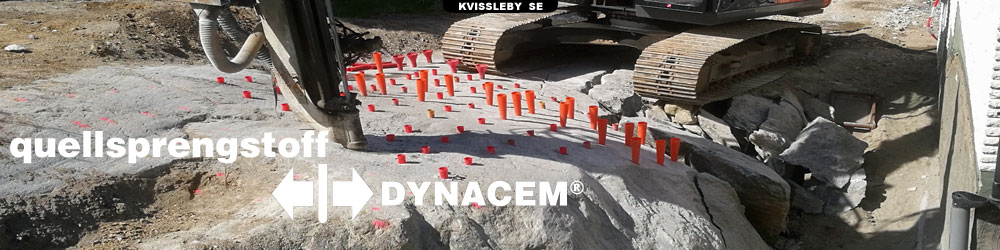
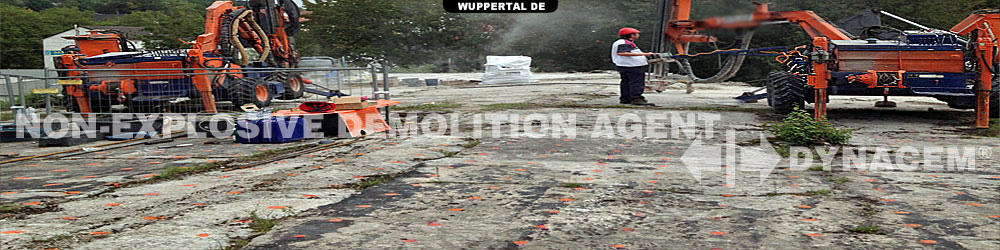
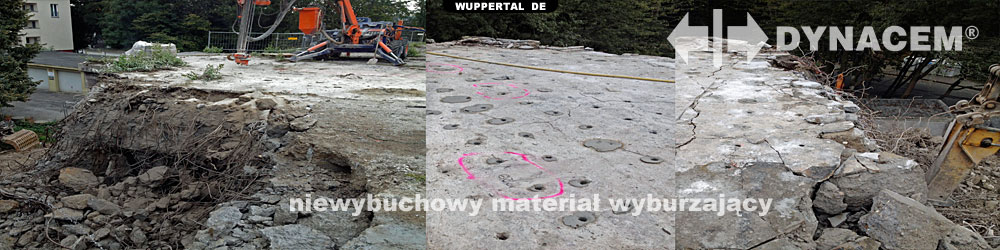
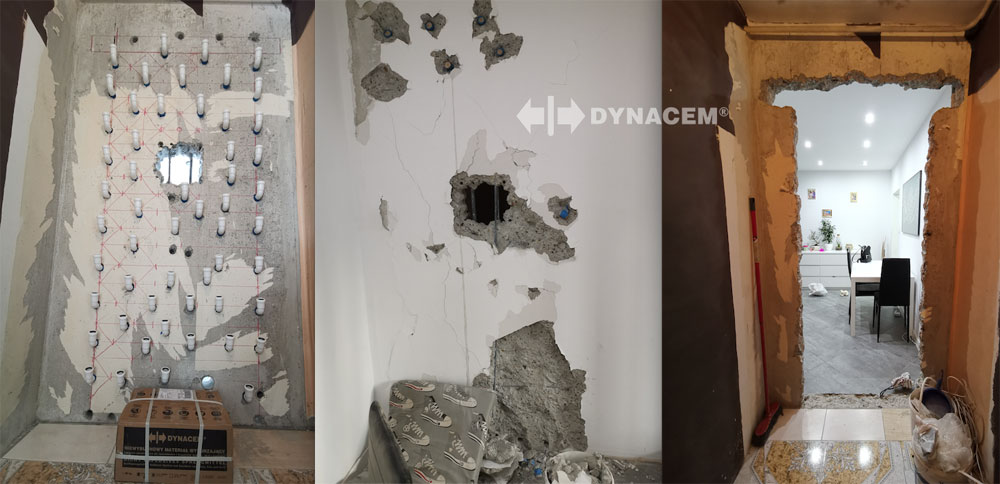
Vertical holes located in the middle of the wall thickness (drilled from the top) are the best solution. The holes are drilled to the planned demolition level to perform demolition in one step (with long drill bit) or in several steps (shorter drill). It is best to fill every other hole in one step and fill remaining holes next day.
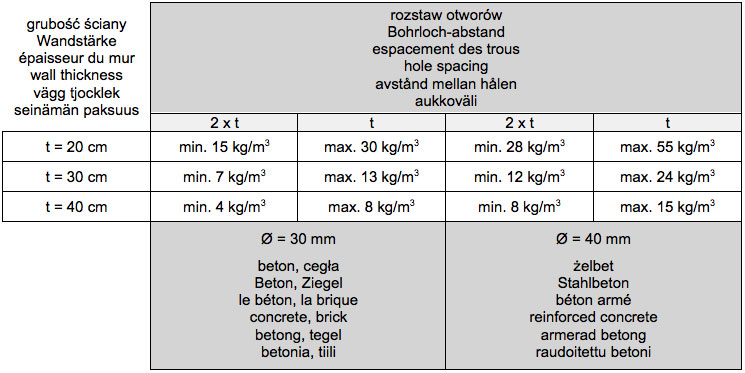
Hole diameter: 38-40 mm in heavily reinforced concrete, 32-38 mm in lightly and non-reinforced concrete, 30 mm in brick or non-reinforced concrete in temperature above 10 deg C, 25 mm in brick walls up to 20 cm thick (T > 10 deg C). Hole diameters smaller than recommended are also in use however time to damage is longer.
Hole spacing: between 1 and 2 times wall thickness. Beginning bigger job it is worth to initially test differnt spacings to obtain uniform cracks distribution in entire volume of the wall. Greater spacing generates better results often:
Approximate consumption of Dynacem for various types and thicknesses of walls demolition is given in the table:
When it is impossible to drill from the top, the holes are drilled from the side, in square drill pattern.
Minimal drilling depth: 5 times hole diameter.
Hole spacing should not exceed 30x30 cm if the rubble will be removed manually or with hand tools. Larger hole spacing, e.g. 40x40 cm, can be used when larger chunks will be removed by the excavator. Hole spacing should not exceed 10/15 diameters (reinforced concrete, hard stone/concrete and bricks).
Inclined holes are easy to fill with liquid Dynacem mix. Horizontal holes can be filled with plastic consistency mix (it is time consuming) or PVC elbows can be plugged into the holes and liquid mix poured through them:
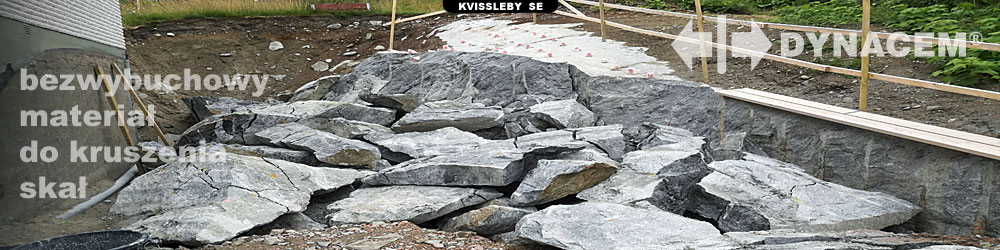
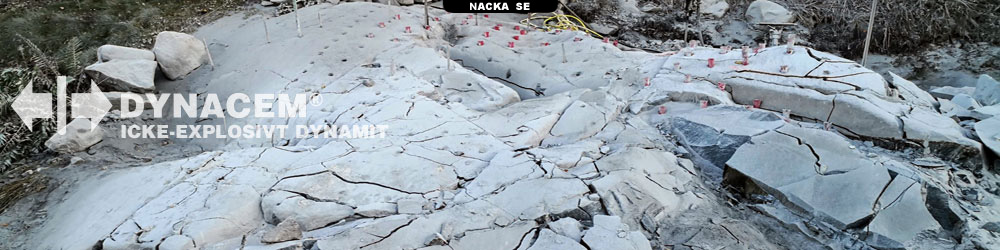
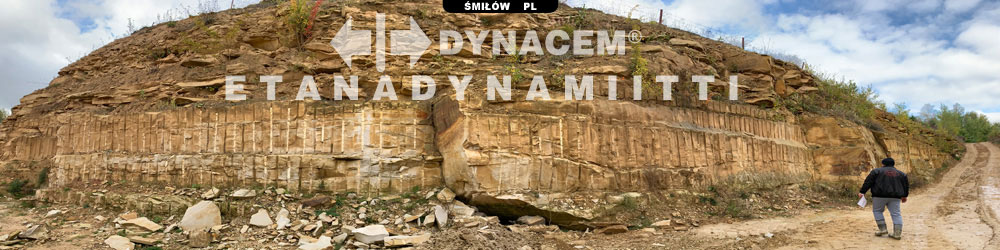
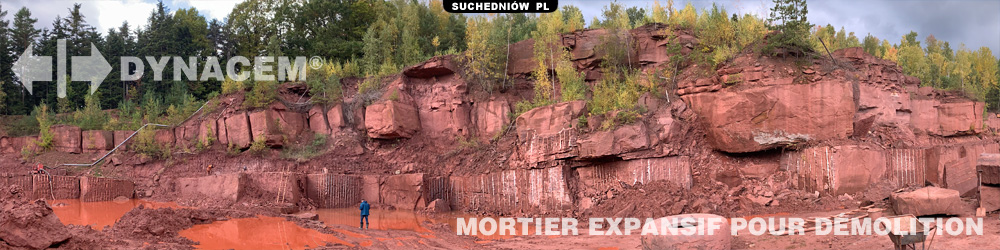
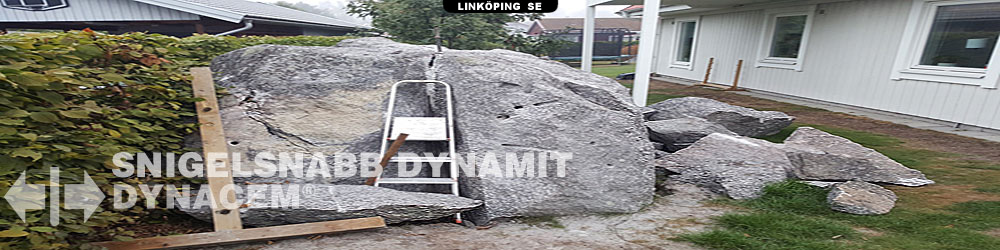
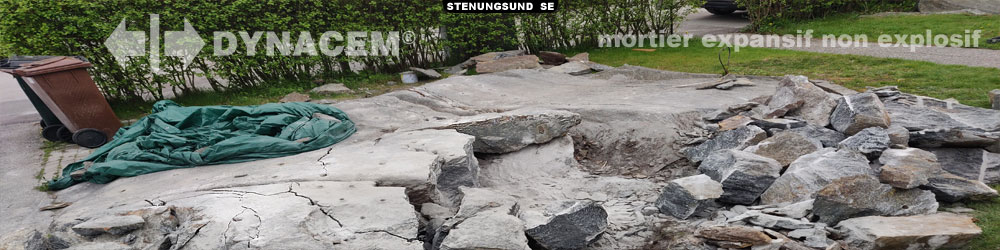
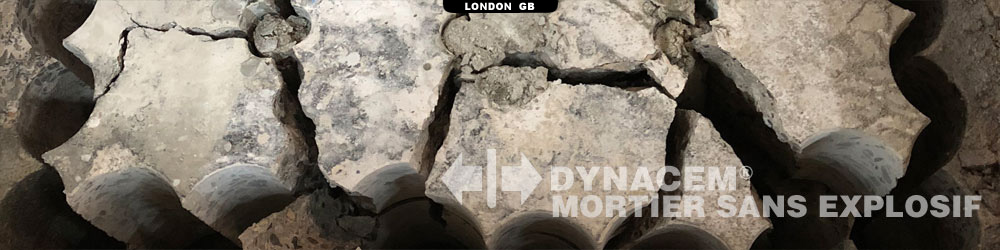
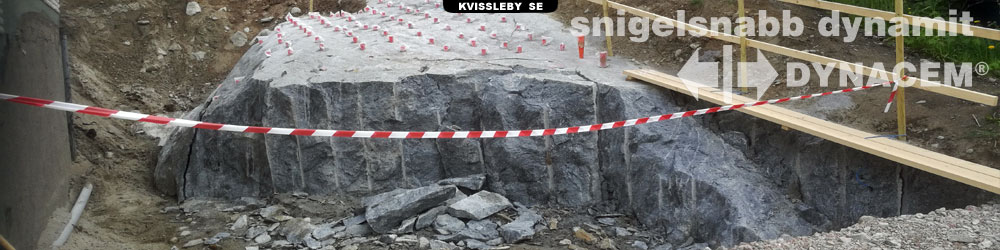
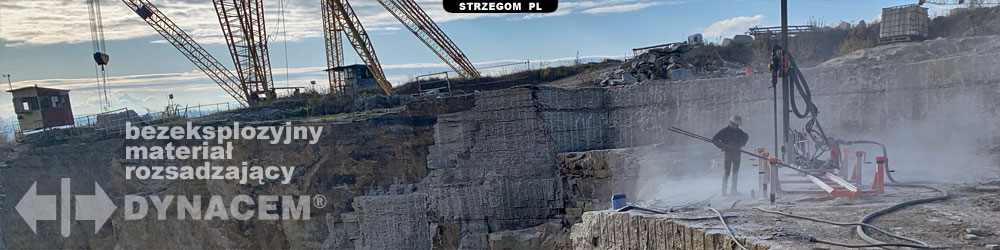
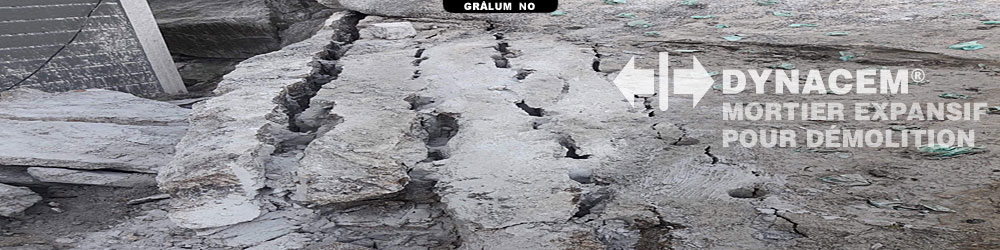
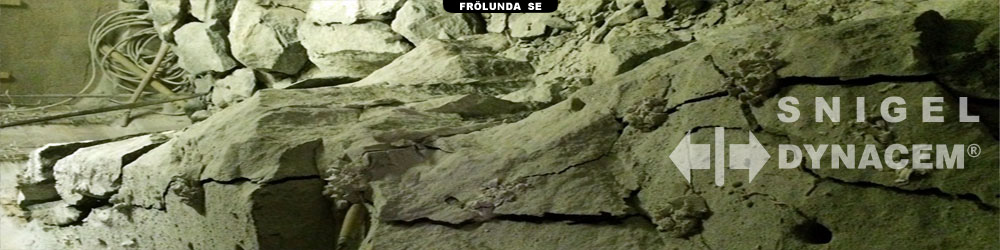
Find galleries of pictures demonstrating demolition of different walls here.
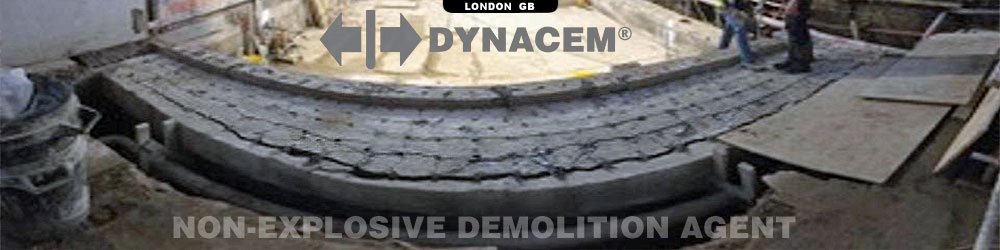
Dynacem is often used for demolition of reinforced concrete (RC) elements and structures.
Dynacem breaks concrete but it is however not able to break the steel bars of diameter above 10-12 mm. It is necessary to remove cracked concrete pieces from between the steel bars after Dynacem reaction. Final removal of cracked concrete is performed with excavator (hammer/bucket attached) or with pneumatic/hydraulic/electric hand operated hammers.
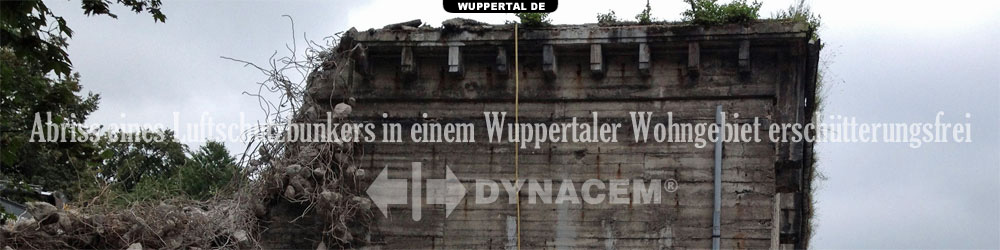
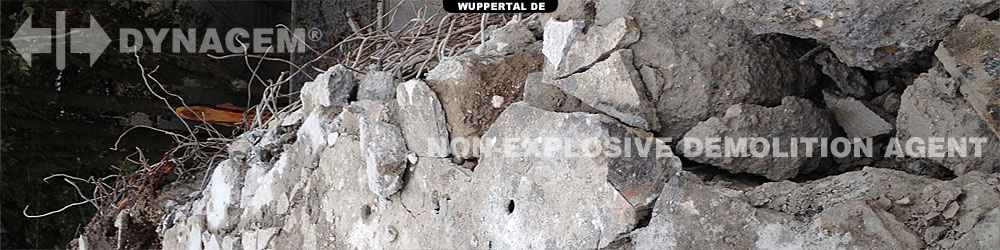
Dynacem helps to avoid explosions and heavy hammering of the concrete. It eliminates shock waves and strong impacts. Demolition can be performed with less noise, vibrations and emissions.
Demolition of rectangular RC element begins from drilling circumferential row of vertical holes 16 cm away from the edge of the element (16 cm = 4 diameters of the hole). It is best to fill every other hole in one step and fill remaining holes next day.
6 hours after filling the circumferential holes are safe and internal holes can be drilled in square drill pattern to break the interior of element.
Circumferential reinforcement is exposed and released (by expansion of Dynacem in outer holes alone or with a little help of a hammer), and should be cut.
Internal holes are filled. 1 (best) or 2 outer rows of holes are filled in one step. Another 1-2 rows are filled up every 1 day.
Removal of cracked concrete begins on day 3rd or later. As long as the cracks grow, the later concrete removal begins, the more the structure will be damaged by Dynacem and the easier it will be to remove.
Hole diameter: 40 mm (32-40 mm for lightly reinforced concrete).
Drilling depth: 95-98 % of element height.
Hole spacing: depends on method being used for the final removal of pre-cracked concrete. Typical cases are listed below.
Hole spacing at hole diameter 40 mm, in heavily reinforced concrete, when final removal of concrete is performed with:
- excavator hammer: 40 x 40 cm (Dynacem consumption 14 kg/m3 of concrete),
- pneumatic/hydraulic hammer: 30 x 30 cm (Dynacem consumption 25 kg/m3 of concrete),
- light electric hammer: 20 x 20 cm (Dynacem consumption 54 kg/m3 of concrete).
Hole spacing at hole diameter 40 mm, in lightly reinforced concrete, when final removal of concrete is performed with:
- excavator bucket: 40 x 40 cm (Dynacem consumption 14 kg/m3 of concrete),
- pneumatic/hydraulic hammer: 33 x 33 cm (Dynacem consumption 20 kg/m3 of concrete),
- light electric hammer: 25 x 25 cm (Dynacem consumption 34 kg/m3 of concrete).
Hole spacing at hole diameter 35 mm, in lightly reinforced concrete, when final removal of concrete is performed with:
- excavator bucket/hammer: 35 x 35 cm (Dynacem consumption 14 kg/m3 of concrete,
- pneumatic/hydraulic hammer: 30 x 30 cm (Dynacem consumption 19 kg/m3 of concrete),
- light electric hammer: 22 x 22 cm (Dynacem consumption 34 kg/m3 of concrete).
To find galleries of pictures demonstrating demolition of reinforced concrete elements and structures click here.
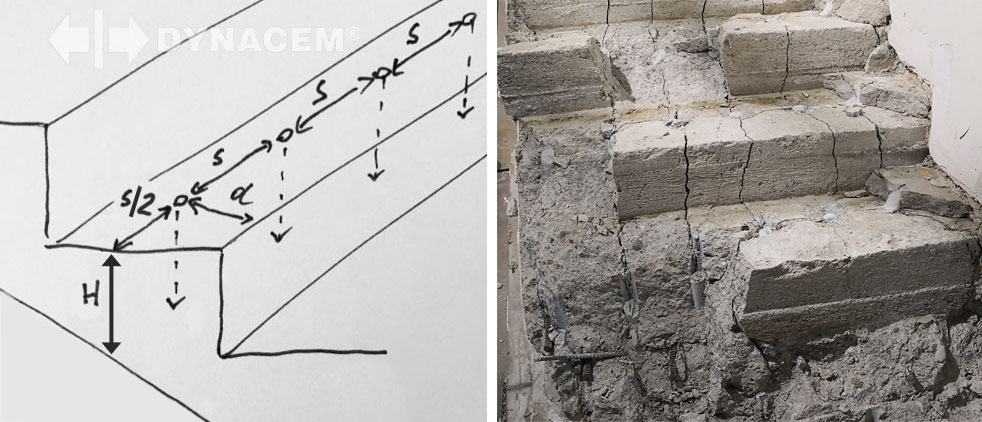
It is necessary to provide support for the structure and take into account that demolition may cause loss of stability and collapse of all or part of the stairs.
It is best to drill vertical holes.
Recommended hole diameter 36-40 mm. Smaller diameters can also work, but with worser results and in the longer time.
Drilling depth = 0,9 x H (the deeper the hole, the greater the destruction).
Always keep d < S < 40 cm (to obtain both longitudinal and transverse cracks).
Greater S values produce bigger cracked concrete pieces. Note that the chunks may be too heavy for manual transport.
Smaller S values provide smaller concrete chunks.
The principle is demonstrated by the sketch below:
Filling holes with Dynacem mixture starts from the free side edge of the stairs.
It is best to fill every other hole on each stair step on the first day and fill the remaining empty holes the day after (filling option A). Remove cracked concrete on the entire area 2-4 days after the last holes were filled.
Holes filling sequence options: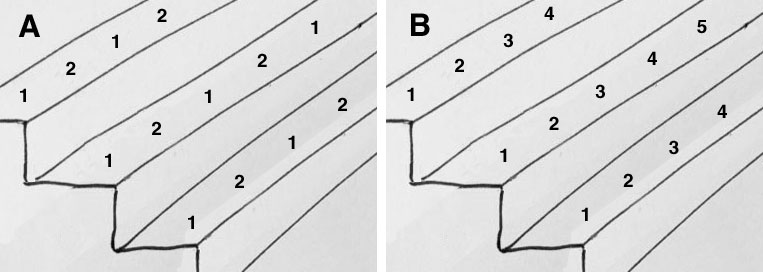
Alternatively, having more time, it is possible to try to demolish the stairs without the support. It is only possible when the stairs have left or right side edge free.
On the first day, just the first holes (from the free side edge of the stairs) are filled at all steps. Then one hole nearest to free edge is filled at each step every 24 hours (filling option B). Remove cracked concrete beginning from the free side edge.
Here you will find photo galleries showing the demolition of various stairs.
Drilling the holes and Dynacem action will produce incomparably less damage to the house and walls, and less noise than hammering.
Stage 1
If the slab has free edges, go to Stage 2.
The procedure is demonstrated on the sketch below.
There are three possible options of Step 1 to choose from.
Drill near the walls and fill the rows of inclined (30-45 degrees) holes A.
Alternatively, drill vertical holes B, located as close to the wall as possible, together with corresponding iclined holes A.
When extremal protection is needed for the walls, drill the holes C, B and A as sketched, and fill holes B and A only. Fill holes C after delamination and removal of cracked concrete from between the holes B and A.
Remove cracked concrete from the whole area near the walls and proceed to Step 2.
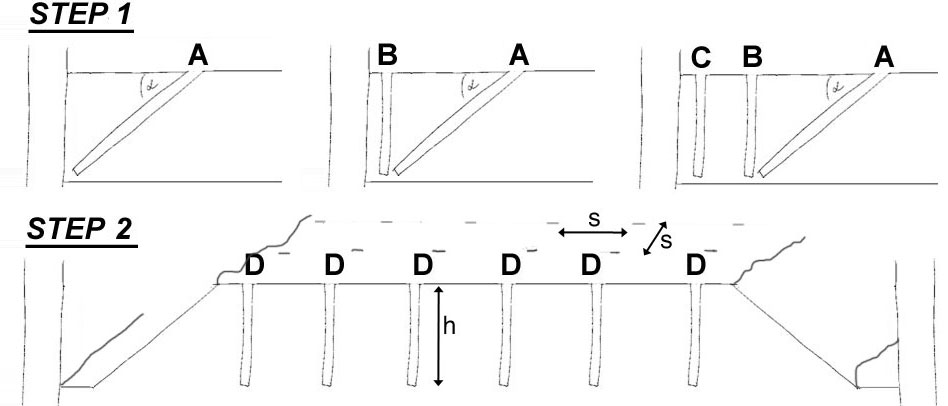
S - hole spacing in square drill pattern
h - drilling depth
Stage 2.
To break internal part of the slab, holes D are used in square drill pattern.
Hole diameter: 30 mm in non-reinforced concrete above 10 deg C, 40 mm is recommended in all other cases. Smaller diameters may also work, but with worser results and in the longer time.
The following conditions must be met at the same time.
S < 2h when non-reinforced concrete slab rests on plastic foil/styrofoam/sand (any sliding support) and whole slab thickness is removed,
or S ≤ h in all other cases.
S < 10 hole diameters when the slab is made of reinforced concrete, or S ≤ 15 hole diameters when the slab is made of non-reinforced concrete.
h ≥ 5 hole diameters (holes can be drilled at an angle in thinner slabs to increase drilling depth).
h > 85 % of the slab thickness being removed (the deeper the hole, the better Dynacem action).
Hole spacing should not exceed 30 cm if the rubble will be removed manually or with hand tools (larger hole spacing can be used when larger chunks will be removed by the excavator).
One (preferably) or two outer rows of holes should be filled every 24 hours. Move the cracked concrete away from the uncracked inside of the slab every day.
Example 1
Non-reinforced concrete slab 30 cm thick, resting on sand, temperature 20 deg C.
Cracked chunks will be removed manually.
Hole diameter: 30 mm
Hole spacing S = 30 x 30 cm (you can drill holes in the 30x30 cm grid nodes or you can follow the sketch below where the holes are spaced 30x30 cm basing on the 26x30 cm grid)
Drilling depth h = 27 cm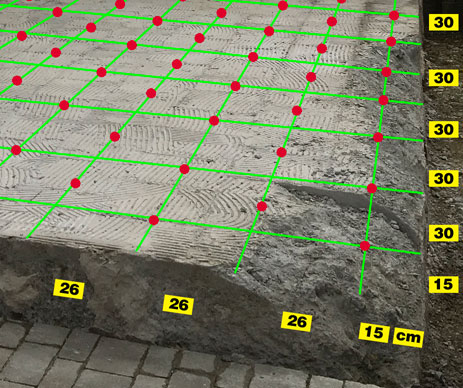
Example 2
Reinforced concrete slab 50 cm thick, resting on plastic film, temperature 20 deg C.
Cracked concrete will be removed with excavator after Dynacem raction.
Hole diameter: 40 mm
Hole spacing S = 35 x 35 cm
Drilling depth h = 45 cm
Holes can be wet or dry inside (wet or dry are equally good) in the moment of filling, but any water standing inside the hole in the moment of filling is detrimental (can cause blowout or decrease the pressure).
Dynacem mix has a liquid state within first 1 (summer) to 5 (below zero deg C) hours.
Intensive rain (or streams flowing over the holes) can wash the liquid mix out off the hole. Light rain can only washouts first 1 or 2 cm of the mix so it is not important. Long light rainfall can however cause powerful stream in some locations depending on the shape of the terrain - it is not acceptable if the stream is flowing over the holes. In majority of cases european rain is not dangerous or light plastic foil can protect the holes.
Holes can be immersed immediately after filling if the water is not moving.